Events
The Event configuration page is where all Event Definitions are listed and where you can create and edit your own Event Definitions. An Event Definition define the specifig tags the system should supervise. Setting Conditions on tags enables the Event to become Active and notifications to be raised whenever the value of those tags exceed some defined boundaries. The Event Definition also enables you to define which Recipients the notifications are to be sent, and whether to notify them via email, phone or push notifications.
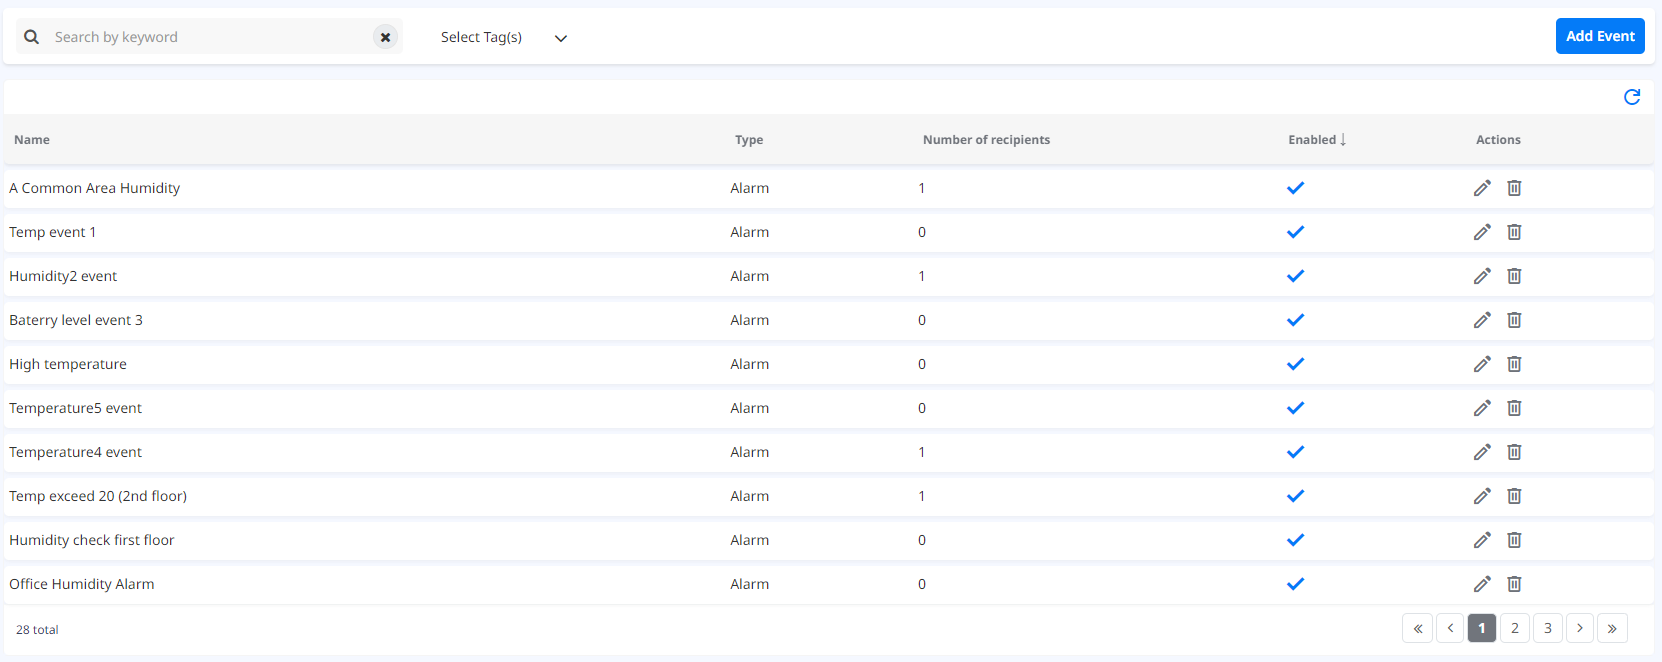
Type of the Event Definition, number of Recipients and if the event definition is enabled, are information displayed in the table. Event Definitions can be created  , edited
  and deleted
 ![]() . Event Definitions can be searched by name or filtered by Tag by the filters provided.
. Event Definitions can be searched by name or filtered by Tag by the filters provided.

Add event
If you click on the “Add event” button “Add event” popup is opened.
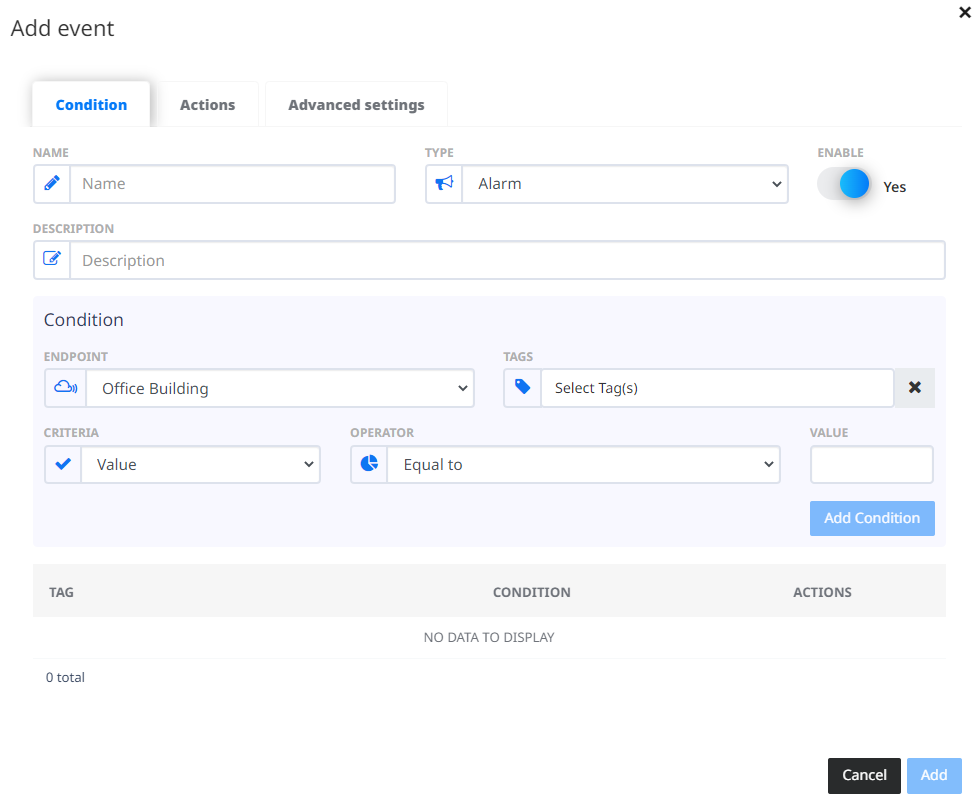
As for the Event Definition it self, “NAME”, “DESCRIPTION”, “TYPE” info should be populated and the event should be enabled if you want it to take the set Actions for the Condition set.
There are two types of Event Definitions: Alarm and Other. Alarms can be acknowledged and can became active and inactive depending of the latest value. Other type of Event Definition just gets archived when the Condition is not met (See Event View page for more details).

Condition
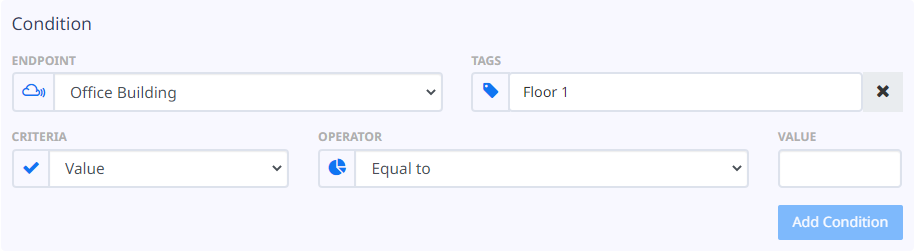
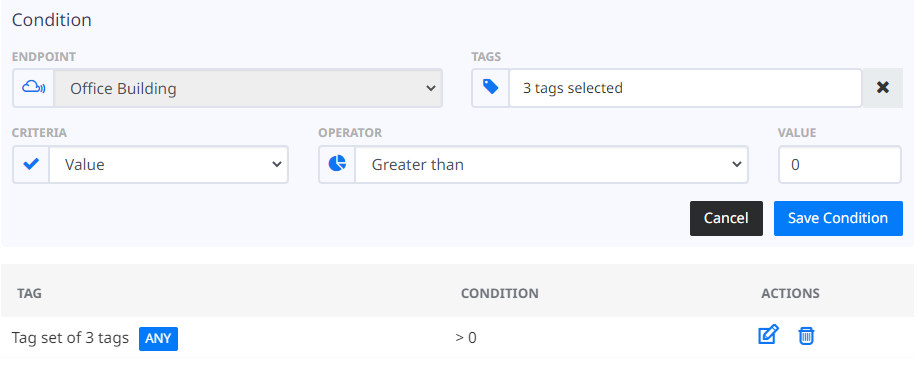
“Condition” tab is preselected  when you open the “Add event” popup. A Condition must be set in order for the Event Instance to be created. You should choose one “ENDPOINT”, and one or many Tags from “TAG” list to create a Condition, and compose the actual Condition forthe Tag’s value. You can add two types of conditions: Condition for the tag value and condition for the not having a value for tag for certain period of time. When you add a condition for the tag value, you can set that the value is equal to, or greater than, or less than, or equal to or greater than, or less than or equal to the value you set in the “VALUE” field. E.g. If you want an event to be raised when the temperature of a fridge raise over 10 degrees, you will create condition with selecting “Value” from “CRITERIA”, selecting “Greater than” from “OPERATOR” and write down “10” in “VALUE” input field. When you add a condition for the not having a value for tag for certain period of time i.e. you want an event to be raised when tag has stopped sending values for e.g. 15 minutes, you will create condition with selecting “Time” from “CRITERIA”, selecting “No value in period of” from “OPERATOR” and write down “15” in “VALUE (MIN)” input field. Minimum value for not having tag values received is 5 minutes.
If the Event Definition is created for many Tags, the Tag that will raise this Event is the Activation Tag which name is used in the display of the name of the Event Instance, listed in the Event View page.
After a Condition is created it is listed in the table below and can be edited  and deleted
  .
.
Actions
Actions can be defined in the tab “Actions”  .
These are notifications that need to be sent in chosen ways to chosen Recipients, with custom content, if the Event Definition Condition is met.
.
These are notifications that need to be sent in chosen ways to chosen Recipients, with custom content, if the Event Definition Condition is met.
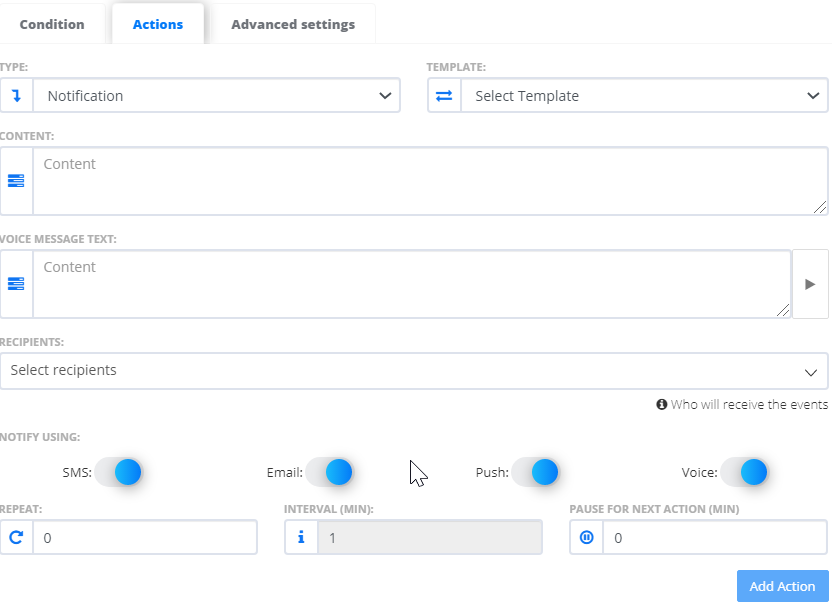
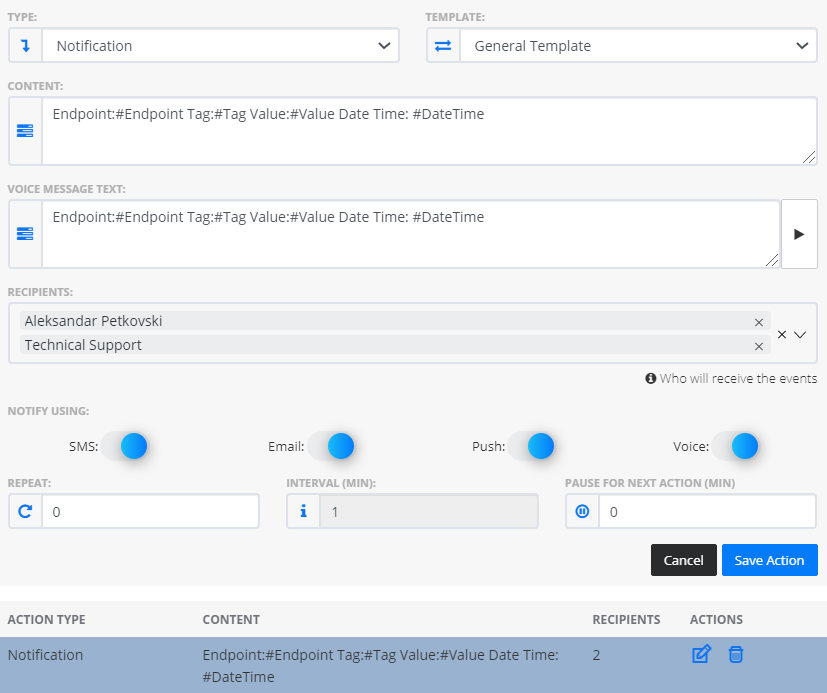
To create an “action”, select type “Notification” from the “TYPE” dropdown.
You can populate “CONTENT” and “VOICE MESSAGE TEXT” by choosing a template from the “TEMPLATE” dropdown, which is editable or by adding a text in the fields. “CONTENT” is required if you have “NOTIFY USING” “SMS”, “Email” and “Push” enabled. “VOICE MESSAGE TEXT” is required if you have “NOTIFY USING” “Voice” enabled. You can play/stop the “VOICE MESSAGE TEXT” to check the whole message that will be played to the Recipient in the Call Notification.
Recipients can be added one by one or as a Recipients Group from the “RECIPIENTS” dropdown.
Notification can be repeated in the number of times set in the “REPEAT” textbox. In “INTERVAL (MIN)” you can define the interval between the notifications if they need to be repeated. In “PAUSE FOR NEXT ACTION (MIN)” you can define the interval between the Actions if they need to be looped (see “EXECUTION” in “Advanced settings” for more details).
Actions added are listed in the table below and can be edited and deleted .
Advanced settings
Advanced settings is where you can set the additional configuration for the Event Definition.

In “GRACE PERIOD (MIN)” you can define the minutes to pass before this Event Instance becomes active after it is created.
In “EXECUTION” you can define if Actions should execute “Once” or many times in “Loop”.
“BREAK WHEN EVENT BECOMES” Inactive or Acknowledged refers to stopping the notifications set to be repeated and all Actions set to be executed again.
Templates management
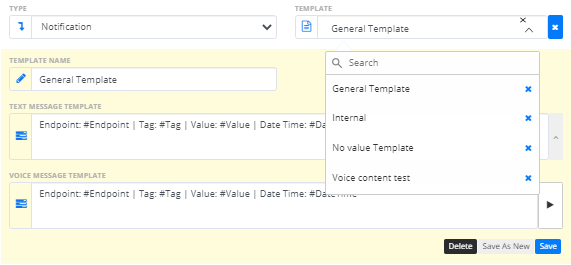
While you add or edit Custom Event you can help yourself creating notification content with choosing a Template. You can use it directly as it is or to change the text for immediate usage. You can add, edit or delete Templates, and use them as such immediate or later when you or other user will add or edit event. Text message template is used for setting E-mail, SMS and Push notifications text. And Voice message template is used for the Voice messages.
Under the Add/Edit Event there is a possibility to manage Templates. You can enter in this mode via clicking the toggle button on the right side of the Template dropdown list.

After you click the toggle button a Manage template panel will be opened. It contains fields for Template name, Text message template and Voice message template. Voice message template is hidden by default and can be seen if you click on the arrow on the right side of Text message template. The Voice message template gets the content from the Text message template if not set. In this case, the additional change of the Text message template gets applied to the Voice message template content also.
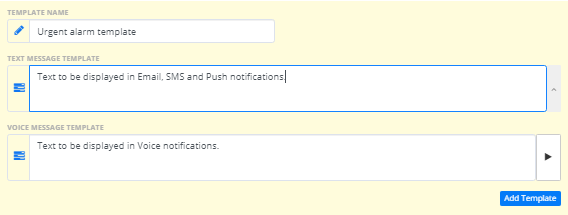
When adding or editing template all fields like Name, Text and Voice message templates are required. Names and combinations of Text and Voice template must be unique to save the template. After a Template is selected from the Template list, the manage template panel fields are populated with it. Edited template can be Saved or Saved As New by clicking the buttons “Save” or “Save As New”. Deleting templates can be done from the panel when the template is selected, “Delete” button, or directly from the Template dropdown list via click on the “x” button. Deselect templates will change the panel to add template mode.