Recipients
In the “Recipients” configuration page, you can list, create, edit and delete Recipients. You can categorize Recipients as individual ![]() and groups
and groups ![]() of recipients. You can use groups in applying rules and notifying many recipients at once. Recipient you create should contains required contact details and availability in order to receive Notifications in many forms. Recipients are organization specific.
of recipients. You can use groups in applying rules and notifying many recipients at once. Recipient you create should contains required contact details and availability in order to receive Notifications in many forms. Recipients are organization specific.
Recipients
There are four types of Notifications that Recipients can receive:
- SMS Text Message on a mobile phone

- Voice Calls

- E-mail

- Push Notifications

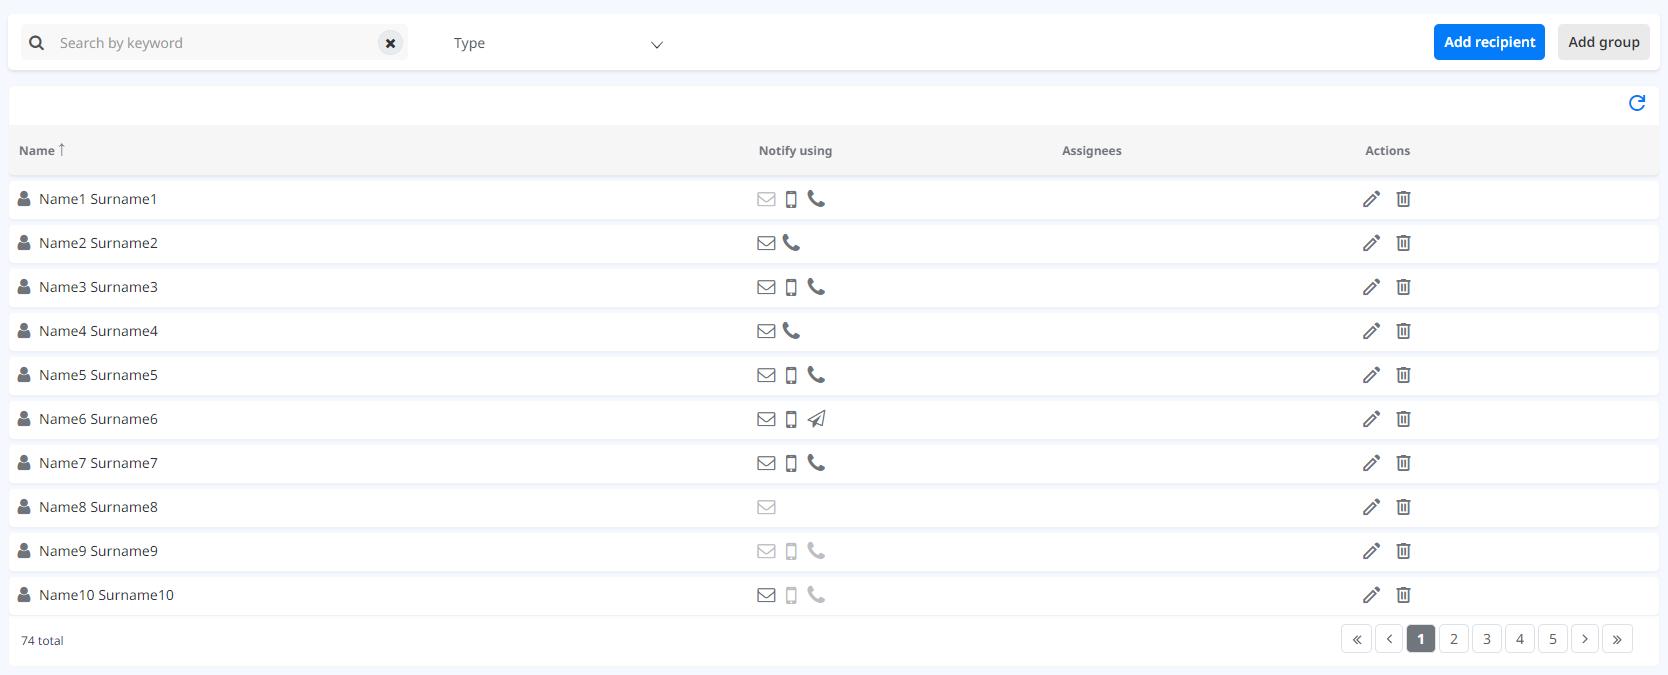
The “Recipients” configuration page lists its Recipients in a table, which shows their name, selected Notification Types, number of Recipients for the Recipients Group. An individual Recipient represents a single person that can receive Notifications. To add a Recipient click the  button by which a form appears:

The individual Recipient form requires basic contact information about the Recipient. To choose a type of Notification that the individual Recipient will receive, you need to fill a specific contact field and enable it by toggling the switch  . After you are done configuring the individual Recipient save the configuration by clicking the
  button or
  to discard the configuration.
A Recipients Group represents a collection of Recipients that can be the receiver of Notifications. To add a Recipients Group click the  button and a form appears:
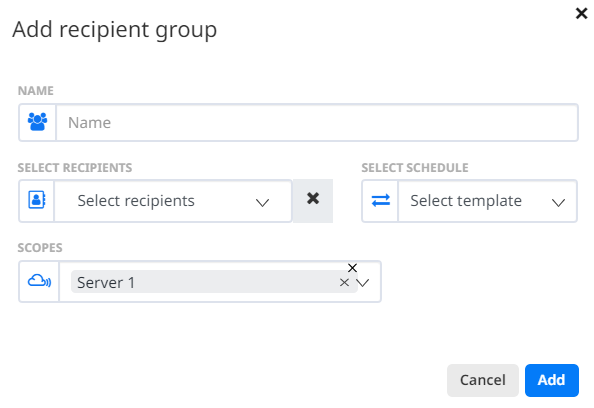
The form requires that you select a name for the Recipients Group, select Recipients from the dropdown list and a Template or schedule for when this group is reachable. After you are done configuring the Recipients Group save the configuration by clicking the button or to discard the configuration.
After filling the table with Recipients and Recipients Groups, you can easily search them by using the search text field and filter them by using the filter select list.

Editing a recipient and recipients groups
You can edit an individual Recipient or a Recipients Group by clicking the  button after which a filled form will appear in which you can make the changes. To remove a Recipient or a Recipients Group click the
 ![]() button.
button.
Recipient and recipient group scopes
When configuring Recipient or Recipient group there is a ‘Scopes’ field in the form.
If the current user who is creating the new Recipient or Recipient group has Endpoint scopes, the ‘Scopes’ field will be preselected with the Endpoint scopes from that user. When editing existing Recipient or Recipient group, the ‘Scopes’ field is preselected with the current Recipient/Recipient group scopes. If the Recipient/Recipient group doesn’t have scopes, the field is empty.