Users
In the Users page you can list all the Users in the system. Users are created or registered in Qlarm and they can login and use the system with authorizations. Users can belong to different organizations. Every organization provides the User specific authorizations. User can be present in the system with a corresponding Recipient.
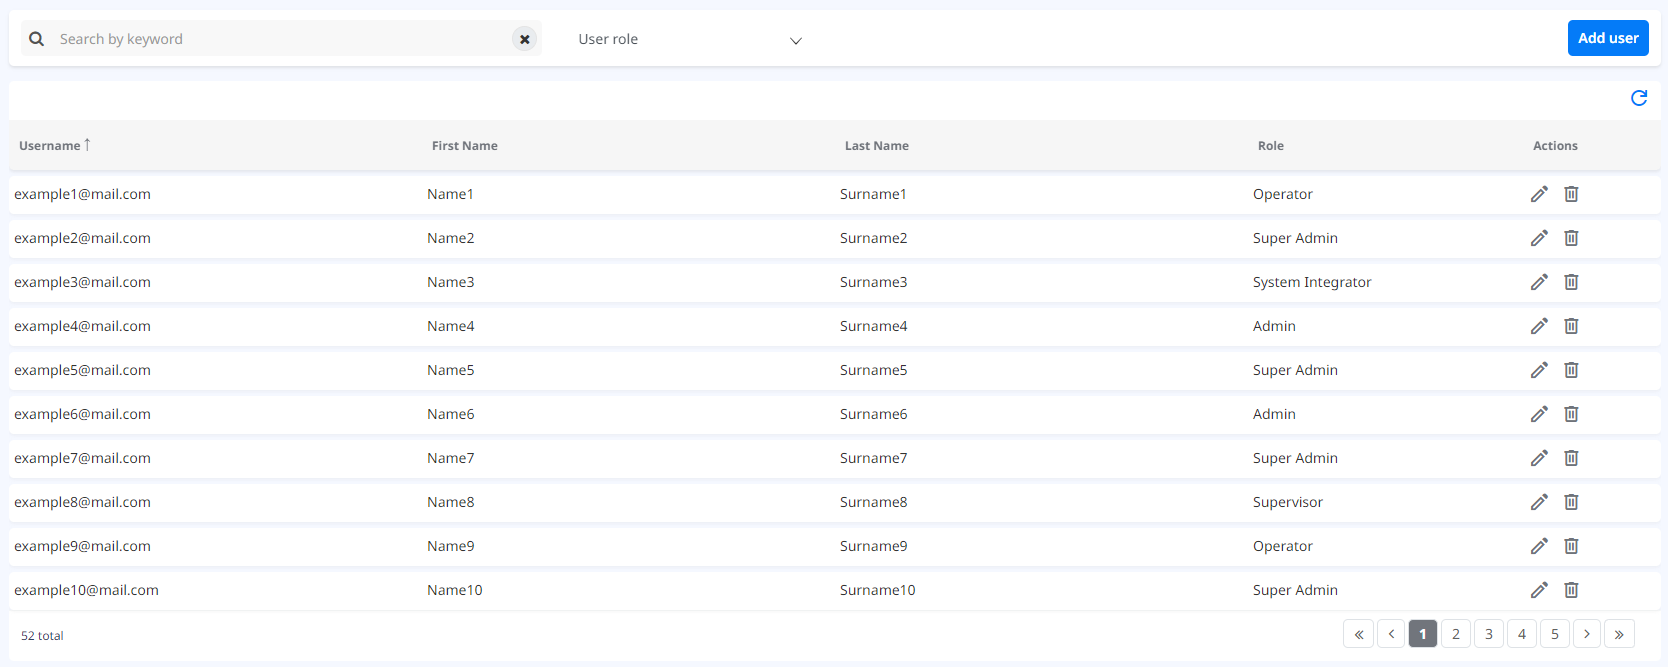
A User can be added, edited or deleted. You can search Users by name and filter them by Role.

Add user
A new user can be added to Qlarm from the Settings -> Users menu, by clicking on the Add User button. This opens a popup window where information about the new user can be entered:
- First name.
- Last name.
- Phone number.
- Role.
- Scopes.
- Asset scopes.
- Email (email account that will be used by the new user to log in to Qlarm).
- Radio button if the user should be listed as a recipient as well.
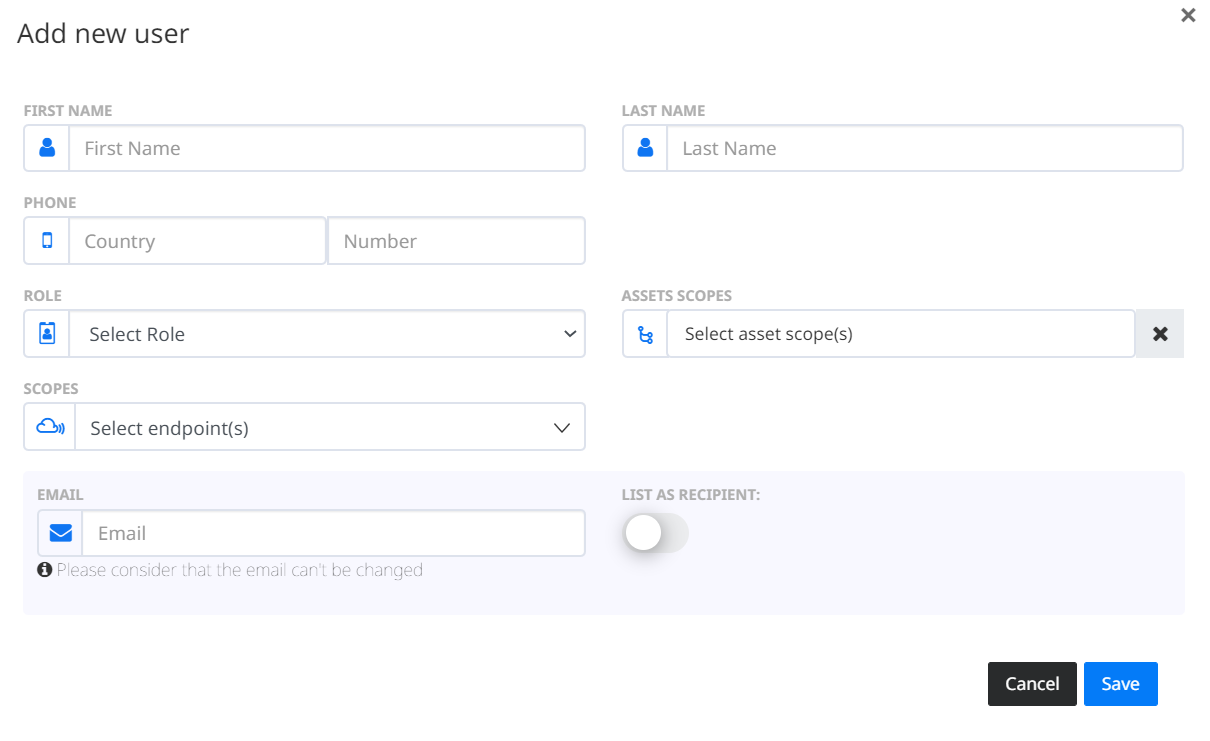
After entering the data and clicking the Save button, the new user will receive an email on the entered email address. The email informs that he/she was added as a user to Qlarm and contains a link to the Qlarm’s Log In screen where he/she will need to enter few more information to complete the registration and to be able to log in to Qlarm.
If the email used for the new user is used for his/hers Azure Active Directory (Azure AD) authentication, then the user will be able to log in to Qlarm using Azure AD authentication as well just by clicking on Enterprise Log In button on the Qlarm’s Log In screen.
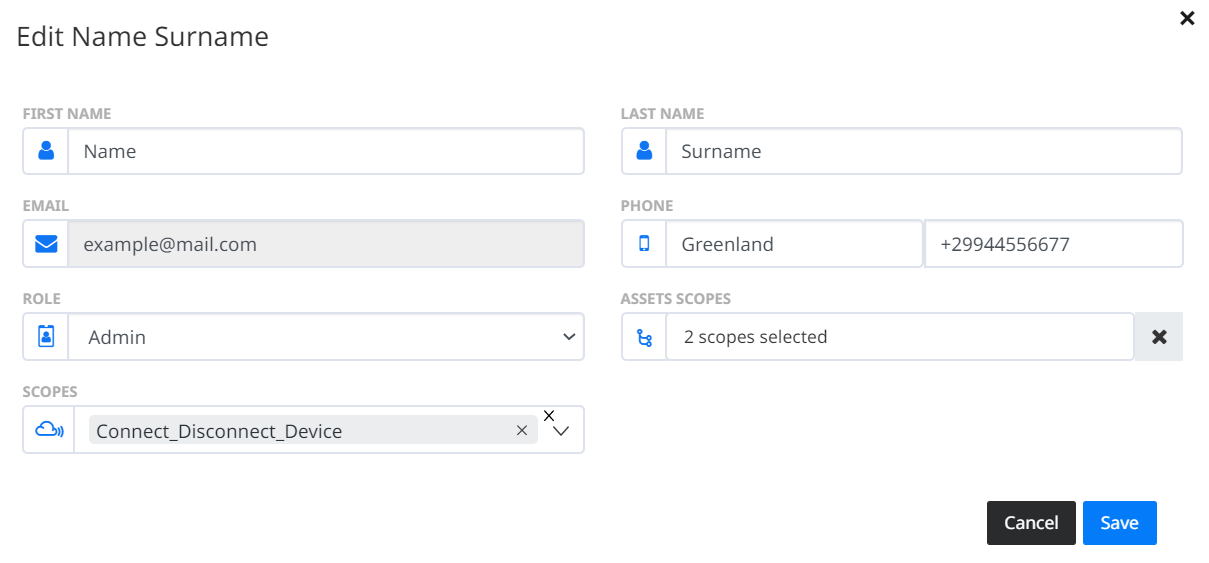
Edit user
To edit the User, click the  button on the User’s row. Scopes for the User can be edited. Name, email and mobile cannot be edited when the User is synchronized with the external active directory. Roles can be edited if the User Account email domain belongs to the organization domains.
Delete user
If the User Account email domain belongs to the organization domains, then the ![]() is provided. If clicked a confirmation popup will appear. If confirmed, the User will be deleted.
is provided. If clicked a confirmation popup will appear. If confirmed, the User will be deleted.
